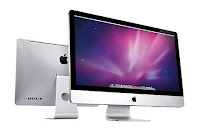
Since its launch, the Mac Mini has been a popular choice for a home theatre PC. Users even choose the Mac Mini over Apple TV because of having far more features and being more expandable and customizable. Besides the obvious home theatre PC, the Mac Mini can also be turned into a fun and useful music server.
Setting up an advanced music server has never been easier with the Mac Mini. So why the Mac Mini? Well first of all the Mad Mini is small, quiet and has very low power consumption (it consumes 13watts while idle). Although a very small computer, the Mac Mini Features a decent processor, has a generous amount of RAM and Hard Disk space. Both the RAM and Hard Drive can be upgraded if required. The final and most important thing about the Mac Mini is it has all the software preinstalled and ready to use for your music server.
To get started with your Mac Mini music server, you must also have an iOS device. This can be an iPad, iPod, or iPhone. Your iOS device will be used to control your music server remotely. The software that will be used is iTunes on the Mac Mini and iTunes Remote on your iOS device.
Modifying your Mac Mini into a music server quite a simple process. Firstly connect your Mac Mini up to your speakers, you can do that by connecting your speakers directly to your Mac Mini's audio port or preferably connect your Mac Mini to an amplifier with a HDMI cable (if your amplifier does not have HDMI, you can use an RCA to Stereo cable). Once you have connected your Mac Mini, you need to set up your iTunes library. You will need to add your songs to your iTunes library by ripping them from CD's, purchasing them from the iTunes store, or transferring them from another library. The next step to take is to set up Home Sharing on iTunes. This can be done by going to
Preferences and
Sharing, tick
Share my library on my local network, you can choose to share the entire iTunes library or choose to share music only.
Once you have set up iTunes on your Mac Mini, you will then need to set up your iOS device. You must firstly download the iTunes Remote from the App Store. Once downloaded you must launch the application, go to
Settings and choose
Add an iTunes library. You will given a 4-digit access code (this will be used to pair your iOS device with your iTunes library). Go back to iTunes on the Mac Mini and click on your iOS device on the left hand menu. Now enter the 4-digit access code from your iOS device. Once that is done your iTunes library can be remotely accessed from your iOS device within WiFi range.
Your Mac Mini Music Server is now complete. Your entire library will be viewable on your iPad, iPhone, or iPod Touch so you don't have to connect a display to your Mac Mini.


